Showing posts with label Mac. Show all posts

Friday, 26 August 2016

FOTD Graduation Makeup - For When I Wanted To Look My Absolute Best

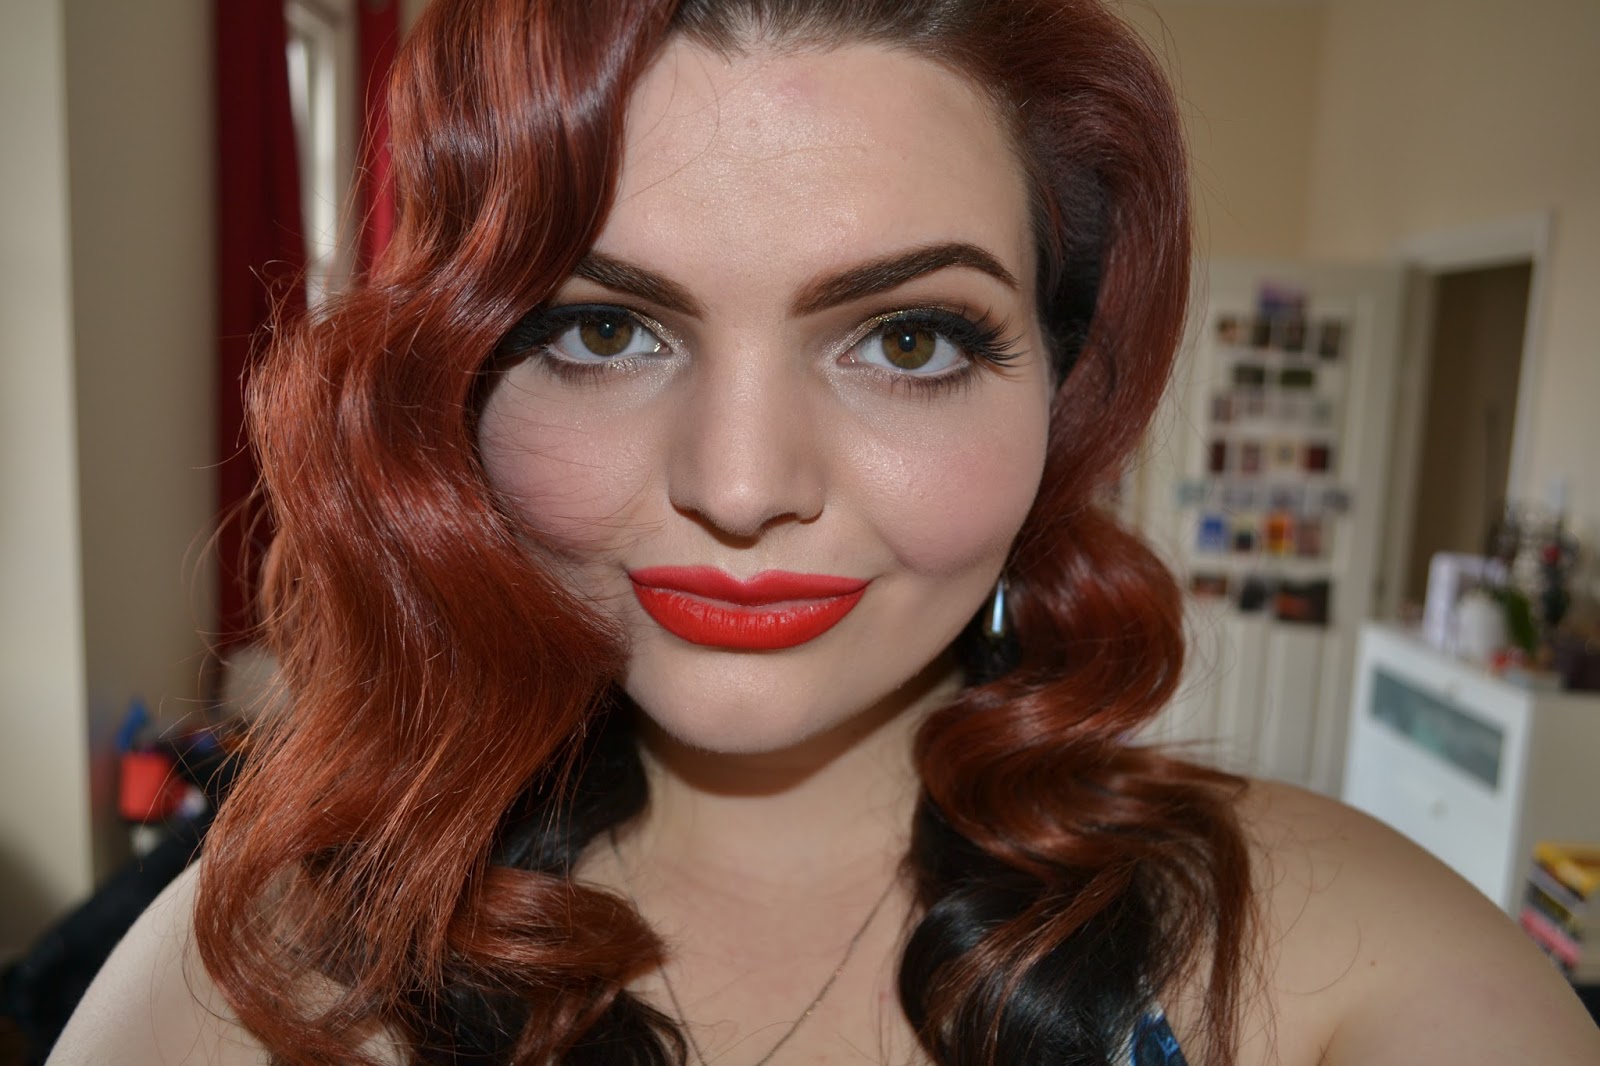
Over a month ago, now, I graduated from University. The ceremony was wonderful, I got to celebrate the with all my favourite people and be incredible proud of my friends and myself. I never thought that the day would mean so much, but it did.

I knew that the photos from the day would be around for the rest of my life, so I figured it was probably a good idea to look the best I could. I had a gorgeous dress, picked out my favourite jewellery, carefully painted my nails and curled my hair into perfect old hollywood waves. All that was left was my makeup, and as a point of pride, it had to be on point.

I knew I wanted a pinup-esque look, with slightly-above-neutral eyes, winged liner, red lips and extravagant lashes. I was so anxious that the makeup would go wrong (we've all had many bad liner days), fortunately, everything went well and I felt somewhat blessed.


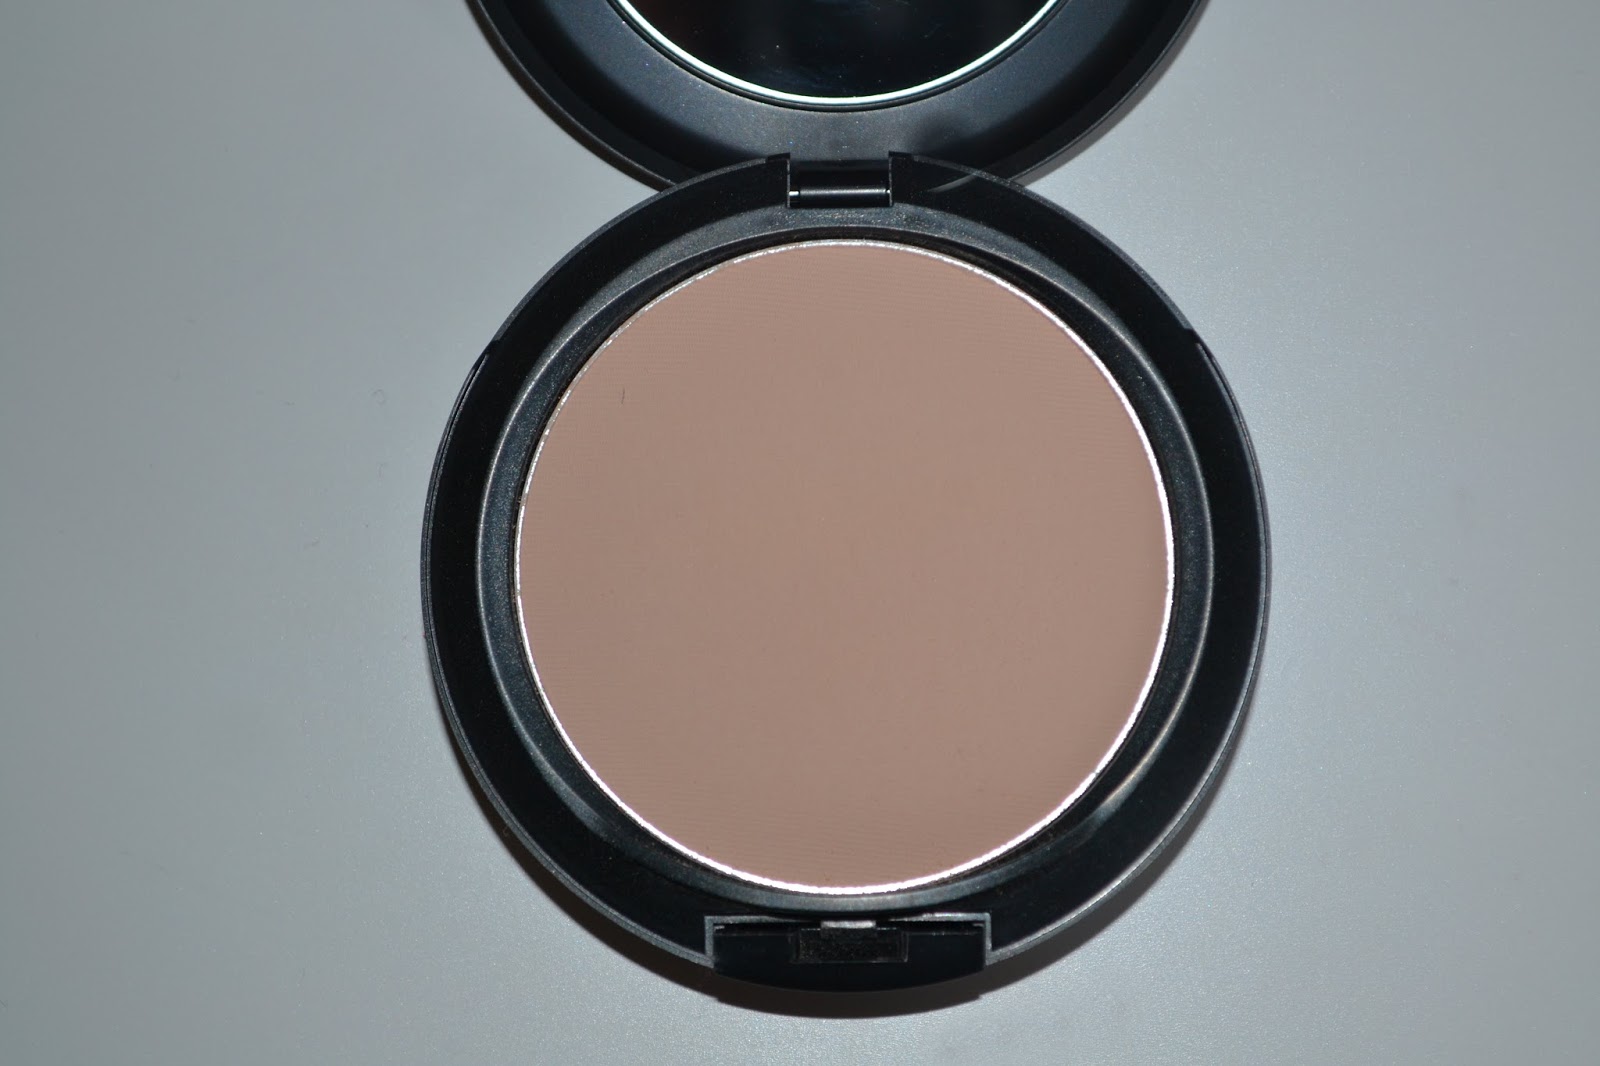
To begin with, I needed perfect skin, so I started with my usual primer, Benefit's Porefessional. I then used Mac's Mineralize Concealer in NC20 under my eyes, around my nose and everywhere where I had discolouration. I set this all with Studio Fix Powder Foundation in NW20 by Mac. I then contoured with Benefit's Hoola, used Nars' Super Orgasm for blush and highlighted with Becca's Shimmering Skin Perfector in Moonstone.


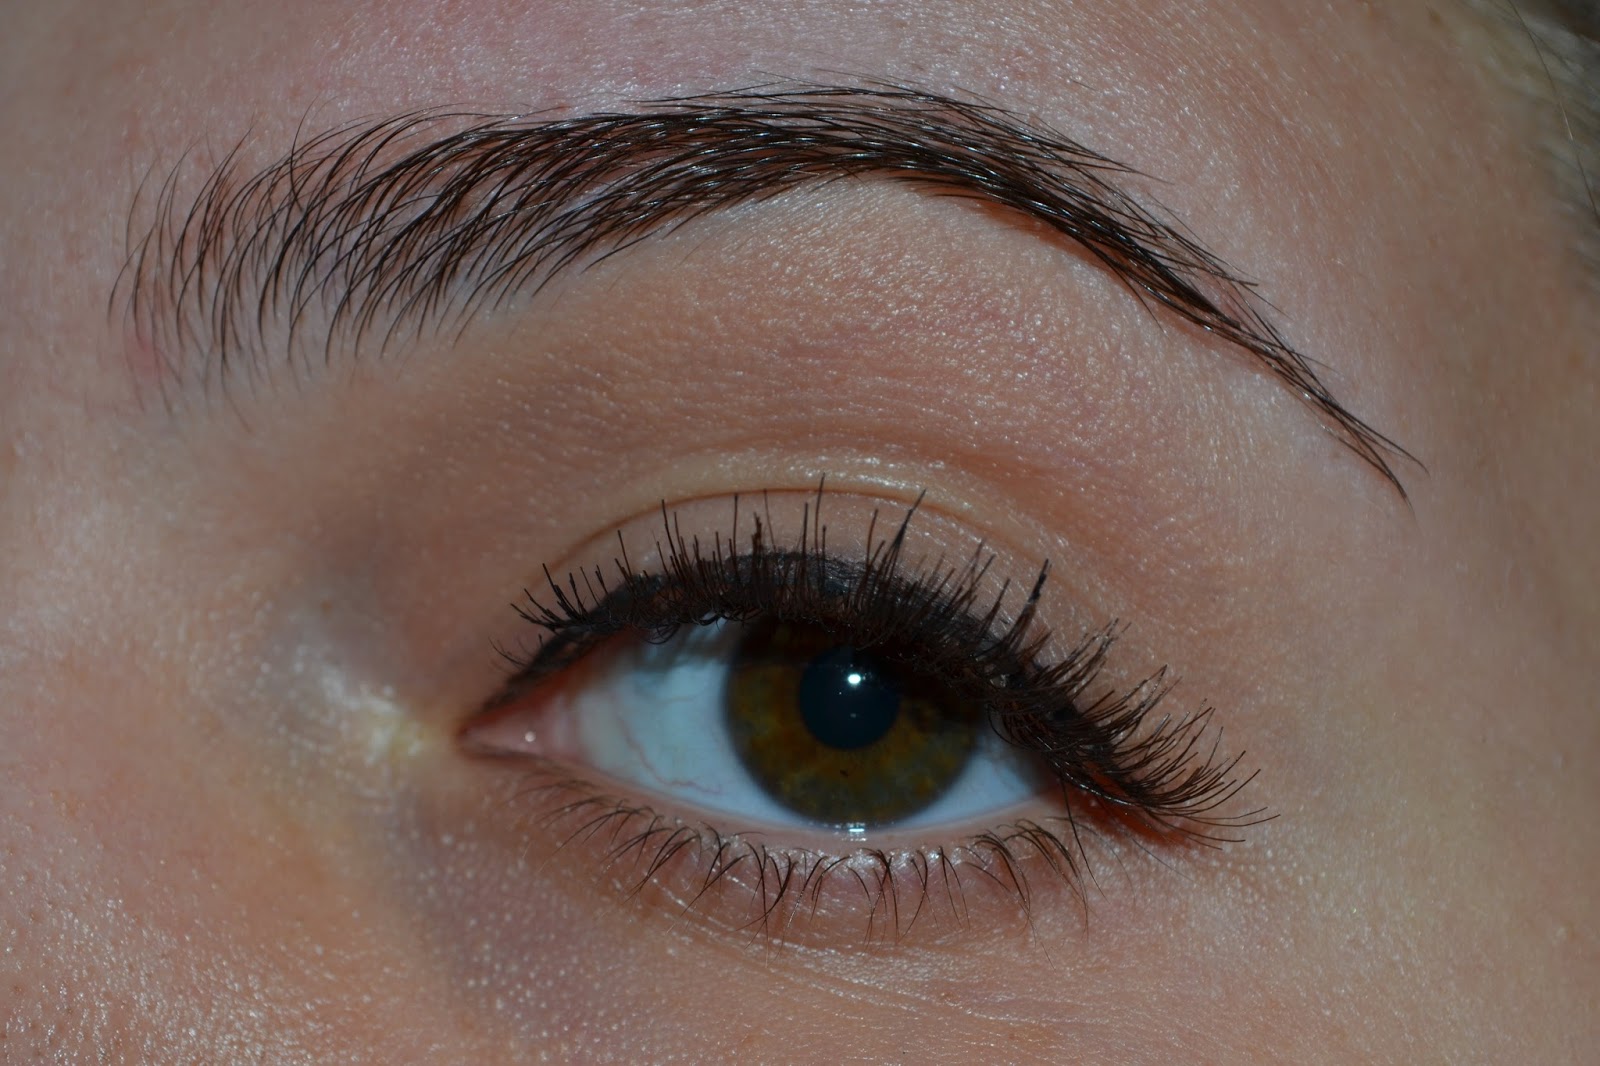
For my brows I used Mac's Cork on the inner section and Inglot's 329 for the rest of the brow. For the eyes I started by priming with Too Faced Shadow Insurance, I then used Mac's Cork in the crease, using Inglot's 329 to deepen the crease. I then used Nyx Jumbo Eye Pencil in Iced Mocha on the lid, setting it with Illamasqua's Pure Pigment in Ore.


I then used So Susan's Haute Light Highlighting Pencil on my waterline and in the inner corner. I set the inner corner with Inglot's Body Pigment Powder in 180. Next I lined the lower lash line with Inglot's eyeshadow in 329. I then used Bourjois' Pinceau Liquid Liner for my winged liner, finishing with Urban Decay's Perversion Mascara and applying Huda Beauty's lashes in Sasha.


For my lips I initially created an outline just slightly bigger than my lips with Mac's Boldly Bare Lip Pencil, then applying Sleek's Matte Me Liquid Lipstick in Rioja Red. I finished by using Make Up For Ever's Mist and Fix Setting Spray to keep everything in place, it being a big day and all (and it worked, my makeup didn't budge all day).


And here's me with some Prosecco in my gown and cap looking really proud of myself. My nail polish is Barry M's Coconut Infused Nail Paint in Flamingo.


To close, this is me and my friends after throwing our caps in the air and laughing because we were very bad at it.

Wednesday, 24 August 2016

Mac Retro Matte Liquid Lipsticks - I'm Still Only Using Liquid Lipsticks

I recently bought a couple more of Mac's Retro Matte Liquid Lipcolours from the Duty Free (the only positive part about the airport experience), so I figured I'd do a post about them, as they are rather lovely.

I've been riding the liquid lipstick train for about a year now and have had no desire to get off. I always get perfect lips with not too much effort, as long as I first line my lips with a neutral shade (my go to being Mac's Boldly Bare). Real lipstick seems like way too much effort now. I also get to fake that my lips are bigger than they are with matte shades.

The mac formula smells like almonds (which is great), and applies slightly drier than the other liquid lipsticks I use (MUA, Sleek, Kat Von D, Nyx), this is not a bad thing, though. Instead of feeling like a thick layer of liquid on the lips that dries to a slightly crusty matte, they apply and dry really comfortably, feeling nicer during the day. They wear really well, the only enemy being greasy food, and then, only the centre of the lips fades away. They retail for £21, so quite a bit more pricey than the MUA and Sleek ones that are my go to, but the formula is nice enough for me to justify it. Also, the range of colours is really good.


From Left to Right: High Drama, Dance With Me, Feels So Grand, Rich And Restless


High Drama


High Drama: This colour applies the most patchily out of the ones I have, but that can be attributed to it being super dark. Two coats does the job, three if you are doing close up, flash photography. Honestly, one looks fine in person if you apply it carefully. This colour is great if you don't have time to do much else to the rest of your makeup; it makes a look. I'm going to be wearing this all Autumn.


Dance With Me


Dance With Me: This is my favourite (possible of all my lip colours). It's a slightly darker, blood red, but not too dark to steal attention from the rest of the makeup, but dark enough to make a big impression on it's own. Again, a tad patchy, but fine for real life.


Feels So Grand


Feels So Grand: This is a perfect daytime red. It's just a bit brighter than a typical red that I would use (I always tend towards darker shades). This is a great standard red, that's not too intimidating. It also applied perfectly with one coat.


Rich And Restless


Rich And Restless: This is a beautiful peach shade that looks incredible with tanned, bronzed skin. England is actually having some Summer at the moment (meaning I'm sweating it out in my room with all the windows open), so this is a perfect shade to wear. It also complements strong eyes really nicely. I would say this needs two coats to look good in person, which very bright shades often need.

Overall, I really like Mac's contribution to the Liquid Lipstick game. They just feel so much nicer during the day and actually layer really well, rather than getting really crusty upon reapplication. They are pretty expensive though, so if you're near an airport, take advantage of that Duty Free, otherwise, see it as an investment piece and get yourself a damn good red.

Thursday, 4 August 2016

FOTD - Gay Pride Makeup

As Gay Pride is happening in Brighton this weekend I thought I'd share the look I wore to London Pride. I worked the morning of and the day after Pride, but I desperately wanted to go, as it would be my first ever Pride.

I had a wonderfully time and it felt so good to be surrounded by people in my community. One of my friends also went in drag and had so many people coming up to him to appreciate it, it was great.


I wanted to have really done skin, so I started with Benefits Porefessional as my Primer. I then used Mac's Mineralize Concealer under my eyes and around my nose and mouth. I used Mac's Studio Fix Powder Plus Foundation over the top of this. I contoured with Benefits Hoola and highlighted the tops of my cheek bones, my cupid's bow, my nose, my chin and my forehead with Becca's Shimmering Skin Perfector in Moonstone - the more plastic looking the better. I then used Nars' Super Orgasm as my blush.


 I outlined my lips with Mac's Boldly Bare, slightly overdrawing them. I then used MUA's Luxe Velvet Lip Laquer in Serene as my lip colour. On my brows I used Mac's Cork on the inner section and Inglot's 329 for the rest of the brow, I then used No7's Lash and Brow Perfector to keep all the hair's in place.


For my eyes I started by priming my lids with Too Faced Shadow Insurance. I then used Cork in the crease, deepening it with Inglot's 329. I then drew a fine line under the lower lashed with 329. I then applied Lit's Glitter in Champagne Wishes on the lid, using Lit's Clearly Liquid Glitter Base. I then used So Susan's Haute Light Highlighting Pencil on my waterline and in the inner corner, setting this with Inglot's Body Pigment Powder in 180.


To finish, I drew a cat eye with Bourjois's Pinceau Liquid Liner, applied Urban Decay's Perversion Mascara and used both top and bottom false lashes, both from Eylure, setting everything with Make Up For Ever's Mist and Fix Spray.


To complete the look, wear excessive amounts of sparkly jewellery, completely curl your hair and wear a dusky pink, faux satin, slutty Prom dress. The handsome man with a purple glitter beard is optional, but recommended.

Happy Pride!

Thursday, 16 July 2015

Violet Chachki Inspired Makeup - I'm Still Obsessed With Drag

So, I love a good gay club, and recently loads of Drag Queens from Rupaul's Drag Race have been appearing at my favourite one. A couple of weeks ago, the winner of Season 7, Miss Violet Chachki herself was there. I got to meet her and get a couple photos. It was brief and I was super drunk, but she said my makeup was cool, so it was pretty awesome.

The makeup look I did was inspired by a look she posted on her instagram. Very pin-up and cool as heck. (Also, the nose ring is fake, for the record).


Let's start with the skin. I primed with Benefit's Porefessional, which I still adore, and then I used Mac's Studio Fix Powder Foundation in NW20, which, again, I still adore. I then used Revlon's PhotoReady Cream Blush in Coral Reef on my cheeks and contoured and highlighted with Sleek's Contour Kit.


For my brows, I used Mac's Cork eyeshadow with a small, bristly angled brush for the inner part. I then used a dark brown from Inglot with a tiny, sharp angled brush, for the rest of the brow. Next, I used a cotton bud to crisp up the lines. I finished with No7's Lash and Brow Perfector, to set the brows, and tidied the hairs with a spoolie.


Now, the eyes. I primed using Two Faced Shadow Insurance. In the crease I used a red eyeshadow by Inglot in 382 and darkened it with a black eyeshadow, also by Inglot, in 391. I used the same black to draw a thin line under the lower lashes, winging out under the tear duct. On the lid I used a base of Nyx's Jumbo Eye Pencil in Milk - which I also used in the inner corner and on the waterline - and set it with a white eyeshadow, again, Inglot, in 373. I then did this giant ass wing, using Bourjois's Liner Pinceau  Liquid Eyeliner, á la Violet Chachki. I finished with L'oreal's Volume Million Lashes for my mascara and a pair of thick, flared out, Eylure lashes.


For lips I used Sleek's Matte Me Lip Cream in Rioja Red, cleaning the lines using No7's Lip Pencil in Fire, and then going back over it with the Lip Cream.


And there we go. I love this look, like a whole lot. And Violet was an absolute darling. For reference, the nose ring is from River Island.


Bonus picture with Violet and me.

Tuesday, 9 June 2015

Post Exam And New Job Haul - AKA I Splurged And I Don't Have To Feel Guilty

So this bitch now has money due to her new job - as a baker at Sainsbury's, unglamorous and my arms are covered in burns, but moneeeyyyyyy. As a result, this here haul. It's a small one, cos I don't plan on being ridiculous, but these are things I've wanted for a while, that are a little pricier, that I can now afford. 


From Left to Right: Mac False Lashes in 43, Bourjois Rouge Edition Velvet Liquid Lipstick in Don't Pink of it!, Benefit's Porefessional and Mac Studio Fix Powder Foundation in NW20.


Bourjois Rouge Edition Velvet Liquid Lipstick in Don't Pink of it!


Bourjois Rouge Edition Velvet Liquid Lipstick in Don't Pink of it!


This applies really beautifully, the doe foot applicator making it very easy for precision. It's super pigmented and feels pretty great on, like, it's not moisturising and it's a bit sticky, but it doesn't feel crusty, which is nice. I tend to wear it in conjunction with Mac's Boldly Bare Lip Pencil to give it depth - and I over-draw my lips with it too, cos I think it looks hot. This is my go to colour at the moment and I love it.


Mac False Lashes in 43


These lashes are just lovely, they're real natural, being a dark brown colour rather than black and being Mac, they have a super thin, clear band, which is more comfortable (I slept in these babies). They just add a touch of thickness and length, which is great. I'm only wearing liquid liner here, and that was only to disguise the inner corner of the lashes. They're more expensive than the lashes I would typically buy, but I think they're worth it.


Benefit Porefessional


This is what my skin looks like normally, I know, it's horrible.


This is what Porefessional does to it. I've got pretty oily skin, so it mattifies it, which is great. It also smoothes my pores, which I need, and is a great base to a foundation. I also slept in this and it held, which is great.


Mac Studio Fix Powder Foundation in NW20


Mac Studio Fix Powder Foundation in NW20


Mac Studio Fix Powder Foundation in NW20


I love how this feels on my skin. I really don't like how liquid foundation feels on my skin, but because my skin is not great, I feel I have to for coverage. This foundation negates that need. The coverage and wear-ability is great (guess what, I slept in this too). This is perfect for summer, being light on the skin, but also providing the coverage I need. I am so happy with this investment.

And, yes, I'm wearing a blanket. Having the heating on in Summer is for rich people.

Sunday, 24 May 2015

Cruella De Vil Makeup - Cos I Started Watching Once Upon A Time And It's Great

So, Once Upon a Time is an amazing show. I was finding season four a little so-so, up until they decided that the second half of the season was going to be about the sassiest bitches in fairytale land. Maleficent, Ursula and Cruella De Vil. Now, Cruella isn't an evil witch, she's just a bad person, period, and I sort of love that. Her style is also flawless, and considering I haven't driven a car since I passed my test two years, I imagine I would drive much like she does. She's a bit of an idol for me, and I love how the show portrayed her. Thus, this make up.

For this look I wanted to go somewhere between Once Upon a Time Cruella and the Disney version, with a touch of drag, cos that obsession has not gone away. You will need a glue stick.


To start with, those brows. First, brush the outer half of your brows upwards, making sure they are all in a uniform direction. Then, take a glue stick the dries clear and work it over that half the of the brow. Keep adding glue until the texture looks smooth, you can use water to smooth is a little (just dip your finger in the water and run it over the glue). Now set this with a loose, translucent powder. Next, cover this with foundation and leave to set.

For the colour, I started with a black eye shadow by Inglot and a fine, angled brush. I wanted the brows to be thick and angular, so I started by defining and exaggerated inner brow with the shadow, taking the line down the bridge of the nose a little ways. Then fill in the brows up until the arch, going beyond your natural arch and creating an exaggerated curve. Make sure the tail is nice and fine (I use an assortment of cotton buds and make up wipes to achieve this). With the shape established, I went over it with liquid liner for intensity and sharpness.


Now, skin. I started with Benefit's Porefessional to prime, I then applied Bourjois's 123 Perfect Foundation. I then used Sleek's Cream Blush in Newport Peach on the apples of my cheeks, as I wanted the cheeks to look quite rounded. Now, contouring is a big ol' deal with this look. Cruella's cheekbones are quite something, to say the least. For this, I took Sleek's contour kit and a medium sized, flat brush, which is smaller than my typical brush, because I want the contour to be a bit more intense. I contoured my cheeks, extending the line further than I typically would, and curving it under my cheek a little, making my cheeks look more rounded and defined. I blended this out using a larger, angled, fluffy brush, but went in again with the smaller brush to keep the definition. I also contoured my nose, under my jaw and my temples. I then highlighted my cheekbones, the tip and bridge of my nose, my chin and above the arches of my brows using the highlighter in Sleek's Contour Kit. I finished by setting everything with Mac's Prep and Prime Transparent Finishing Powder.

For lips I used Sleek's Matte Me liquid lipstick in Rioja Red.

Now, these intense ass eyes. I started by priming with Two Faced Shadow Insurance. I then took a stiff pencil brush and an Inglot black eye shadow to define the cut crease, making sure the outer edge has a sharp edge and that the inner corner blends into the brow. I blended it out with a fluffy brush the best I could, considering the glue stick. I then used Maybelline's Color Tattoo in Light in Purple over my lid as a base. Over that I used Collection's Glam Crystals Glitter Liner in Rock Chick as a base for Stargazer's Glitter Shaker in Onix, which I patted over the top. I then used Nyx's Jumbo Eye Pencil in Milk on the brow bone and the waterline, setting it with a white eye shadow from Inglot.


For under the eye, I took the angled brush with a black eye shadow, creating a sharp line under the lashes and then creating a sharp, exaggerated tear duct. I then applied spiky false lashes under the eye and super thick lashes on the upper lid.


And there we go. All done. I promised a mental look. Next time I'm thinking a haul post, cos this bitch wants to go shopping.

Tuesday, 19 May 2015

Women Of Shakespeare - Juliet, Something Neutral For Once

So this look has been sitting on the back burner for a while, as you can tell from the colour of my hair. And by that I mean I wore this look Christmas shopping. I've been busy. Really busy actually, as I had my last of four exams today and I started my new job three weeks ago. It has been a seriously intense month and I am so happy to see its close. BUT, positives; I have a job and thus more money to buy make up and now I have a Summer to read books and paint my face, so upsides.

Juliet is possibly Shakespeare's most identifiable heroine. Most people I've met had to study Romeo and Juliet in school, those that didn't would be familiar with the story anyway - it's iconic. And Baz Lurhmann's film is pretty darn amazing, so there's that.

Juliet is a thirteen year old girl who's beauty puts the moon to shame, which, I personally feel, is hard to bring to life. However, I attempted it. Now, Romeo uses a whole lot of light metaphors when talking about Juliet; she is pale and glowing - so skin is a big deal with this look. With the rest of the look I wanted to look youthful, natural and girly. I take a pinch of salt when it comes to natural, and I'm not sorry about that.


First off the skin. I used Benefit's Porefessional to prime, because my pores are just horrible and this product disguises that. I then used my typical foundation, which is 123 perfect by Bourjois in Vanilla. I then contoured with Sleek's contour kit because I was going out and it makes my face look better. If I were not leaving the house, I would cut out the contour to make the face look rounder and more youthful. But with my face, even with contour, I'm getting that anyway. I then used Sleek's cream blush in OC. Now, highlighting. I used MUA's Shimmer Highlighter in Pink Shimmer, which I feel works well for this more girly look. I applied it to my cheekbones, my chin, my cupid's bow, the tip and bridge of my nose and above my brows because I wanted to glow brighter than the moon. I finished with Mac's Transparent Finishing Powder, because I have oily skin.


Now, eyes. I primed with Two Faced Shadow insurance to start, I then almost exclusively used the shadows from Sleek's Au Naturel palette, the only exception being Mac's Cork. I took a fine, angled brush with Cork and drew a line just above my crease and then winging it out at the end, dipping a little down to the outer corner to create that triangle shape. The colour will drag, so apply with short strokes that build upon each other. Doing the crease like this will make the eyes appear a little bigger. I then darkened this line with Bark from the Au Naturel palette using the same brush. Then take a clean blending brush to soften this line a little. I then took Nyx Jumbo Eye Pencil in Milk and applied it all over my lid, inner corner and water line, blending it in with my finger. I then applied Honeycomb from the Sleek palette over the top of this, all over the lid. In in the inner corner I applied Nougat and blended it onto the lid, right up to the exaggerated crease.


 I then used Bourjois' Pinceau Liquid Liner to apply a very thin winged line, again, to make the eyes appear bigger. I applied a touch of Bark under the eye, using an angled brush and finished with mascara and some wispy false lashes (Demi-Wispies by Ardell if I remember correctly.


Then, to finish, the lips. I applied a red lip gloss by Barry M to the upper lip, I then rolled my lips together a little for the basis of the ombre on the lower lip. I then dabbed a little more colour on the centre, blending it out with my finger.

And here it is, a moderately natural look. The next look will not be, I glued down my eyebrows and everything for that one.

Sunday, 26 April 2015

Adore Delano Drag Makeup - The Newest Time Sink In My Life

So a dear friend of mine introduced me to a little show called Rupaul's Drag Race, and, well, now I'm sort of obsessed (I may be watching it whilst writing this). The show is camp, glitzy and right up my alley (cos makeup, fashion, puns and the camp, all the camp). I am simply in love.

One of my favourite Queens of all time is Adore Delano. She is so damn funny and her lips! I live for her lips. This here is my interpretation of her look. It's a fairly tame one, cos I'll be damned if I'm gonna really go for those brows, I am too lazy for that shit. Nonetheless, I had a lot of fun with this look.


Lets start with the skin. Drag Queens wear a whole lot of face products, mainly because they are men painting to look like women, but also a lot of them are performers, so they need makeup that stays through sweat and looks good under harsh lights. That means heavy and matte.

To start I applied a primer all over my face, as my pores are pretty awful and need covering - I used Pore-fessional from Benefit, which I got as a free sample from a magazine and actually need to buy a full thing of, as it's pretty great. Then I used my usual foundation, which is 123 Perfect by Bourjois. It's a matte foundation, as I have oily skin, it's also a long lasting one, so it fits the bill.


Next is the contouring, which is a big deal for drag. I used a Sleek contour palette and a large, angled, fluffy brush to apply colour in the hollows of my cheeks, under my jaw and at my temples. I then used a smaller fluffy brush to deepen the cheek and then to contour my nose. For the nose I blended a thin line down either side of the bridge, joining up the lines under the tip of my nose. You don't want to darken the sides of the nose too much, because it can actually make the nose appear wider.

Then there is baking. Baking (also known as cooking) is where a product is left to settle into the skin before being blended in. I used this technique to emphasize my cheek contour. I took a translucent powder - Mac's Prep and Prime Transparent Finishing Powder - and patted it underneath my contour using a makeup sponge, you want to create a really sharp line. Then you leave it for five minutes or so, I tend to leave it on whilst finishing off my eyes, or something like that. Then I just blend it away whilst finishing my skin with the same powder.

Now highlighting. So, you still want it to be matte, but also to be noticeably there. For this purpose I used a matte, white eye shadow from Inglot. I used a small fluffy brush to apply the colour to my cheekbones and under my eyes - Kim Kardashian style - then on the tip and bridge of my nose, on my cupid's bow, the top curve of my chin (to hide my butt chin) and above the arches of my brows, blending upwards. I then built a little more colour on my cheekbones, as I want them to be highlighted the most.


Now for the eyes. Start with a primer - I use Two Faced Shadow Insurance. Now, the liner is the main focus of this look, so the shadow is fairly minimal. I used an Inglot eye shadow that is three shades of a warm brown in one pan. I started with using the medium shade in the crease, blending it towards the nose. I then used the darkest shade to darken the crease. I then used the lightest shade on the lid. Next, I used Nyx Jumbo Eye Pencil in Milk on the waterline and in the inner corner, I used a white eye shadow by Inglot to set this.

For the brows I used a small angled brush and a black eye shadow. Adore's brows are amazing, so I couldn't fully replicate them. However, the gist is very dark, very angled and big on the front part. I used the shadow to create a boxy shape for the front part and a very fine tail.


Now the liner. I used Rimmel's Glam Eyes Liquid Liner, some people would use gel liner, not me, I hate that stuff. I've tried, I really have, but it does not work for me. If it works for you, use it, but I'm sticking with my liquid liner honey. Now, you want the liner to have a sharper angle at the outer edge than you would typically do, and go longer, and thicker. Start at the outer corner of the eye and draw a line towards the brow. Then draw a line on the lashes and then keep building that line until it basically fills the mobile lid. Join the line up with the outer line, creating a curve rather than a straight line.

For underneath the eye start with the exaggerated tear duct, making sure the point is very sharp. Then draw a line very closely underneath the lower lashes. Draw a line out from the outer corner, leaving a large V between the two lines, this basically going to be a horizontal line from the outer corner. Now thicken the line, taking the outer flick as a starting point. To finish the eyes, mascara and the biggest lashes you own.


Now those amazing, amazing lips. I wanted to go matte red, because a matte texture will help disguise my natural lip line. Now, I started with a No 7 Lip Pencil in Fire. I started by drawing a line just outside of my natural lips, I then built on this, not straying too far away from the actual shape of lips, whilst straying very far from my actual lip size. I then used the liner to fill in my lips. I then applied Sleek's Pout Paint in Pin Up over this, but I'd actually recommend using a lipstick. To finish, I patted a translucent powder over the top to mattify the lips, using a small flat brush, for precision.

 And there we are. A drag makeup look. I had to open the door to a pizza guy wearing this, he looked a little shocked, to say the least. Despite this, I sort of want to wear this out. Maybe I'll skip the lips.