Showing posts with label Halloween. Show all posts

Sunday, 25 October 2015

6 Makeup Looks To Make A Halloween Outfit - For When You Don't Want To Buy A Real Costume

So Halloween is on it's way, and I love it! It's a holiday for makeup artists, I swear. But I really can't be dealing with buying an expensive, but cheap looking, costume. I'm all about pulling a cute, little, black dress from my wardrobe and pairing it with some fierce paint (that and a few choice accessories).

So, here I have 6 makeup looks that will make a Halloween costume.


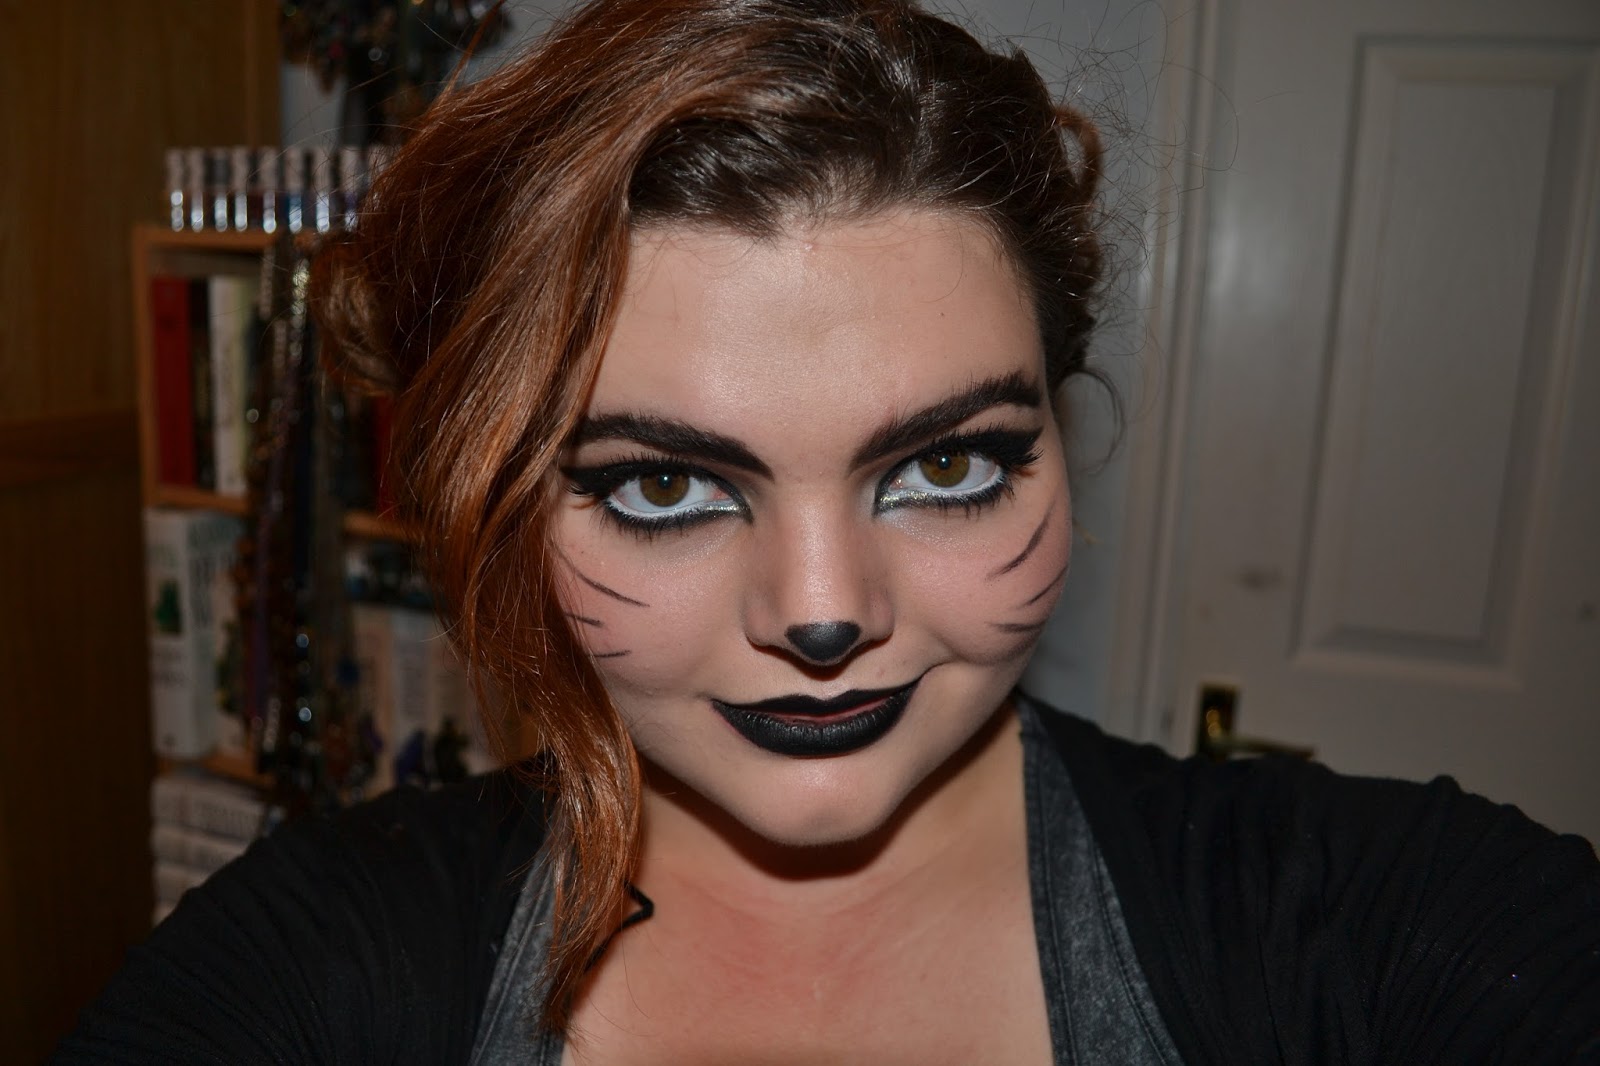
To start with we have the old faithful of all girls on Halloween, a black cat. Most girls will buy some ears, maybe a tail, and then just wear all black. This year you can go one step better and wear some costume appropriate makeup.
The key parts of the look are the nose and the whiskers, for a little extra, the intense cat eye, the dark lips and brushing up the brows.


Next is something a little different (and way harder). You really don't need anything extra with this look, because it's such a show piece. The skeleton. You'll need white foundation, black and white eyeliners and eyeshadows and a whole lot of patience. You will definitely impress, however.
You can go all out and buy a skeleton outfit (and a wig), but really, all this needs is a black dress.


Now, this is a much simpler look, and thus the accessories are key to make it work. The witch. You will at least need a witches hat, and maybe a broomstick if you're feeling particularly fancy.
For the makeup, do a smoky eye using purple or blue tones, making sure to blend it lower under the bottom lashes than you would typically. Pair with a dark lip, I chose purple, as I feel it is very witchy.


The Vampire. The look I fall back on most. Mostly because of my enduring love for Vampire Diaries and True Blood. You can start with just the white foundation and the bloody mouth, but for a little extra, put red eyeliner on the water line and do some heavy contouring. For a sleek vampire, do a red lip and pair with some thick false lashes.


You can also do the 'hungry vampire' (which was inspired by Only Lover's Left Alive). Pat red lipstick in the centre of your lips and make the shadows in your face extra deep.
All you need to do is buy some cheap fake teeth and wear them for the first 5 minutes of the party and you're set.


This is another hard one, but really speaks for itself. A Raven. People may ask what you are, but they will say you look incredible regardless. The false lashes are fairly important to this look, but aren't all that expensive. If you have any kind of black feathers in your wardrobe, that's perfect, but really, you just need to wear something drapey and black and keep repeating 'nevermore' all night.


Finally, the Sugar Skull. Another mission of a makeup look, but well worth it. There are many styles out there (such as my post from last year). This year I chose to use roses as my theme, which is quite traditional. Pair this with some flowers in your hair and you're set.

There you go, 6 looks that will let you be a bit lazy this year.

Friday, 9 January 2015

Women From Shakespeare - A Series Of Make Up Looks Stemming From Procrastination

So, I decided to do a series of make up looks inspired by the women in Shakespeare's plays (and possibly poetry depending on what I feel like - dark lady make up, anyone?). This originated from me trying to plan a Shakespeare essay whilst having a shower, ending up in me thinking that wouldn't it be a great idea if I did Shakespeare themed make up. That essay did get written (never mind that it was finished at 7 in the morning), and some make up looks were done.

The obvious start for me was Ophelia. Hamlet is the Shakespeare play, others may be incredibly famous, but Hamlet is the big one. Also Millais painted her that one time (I'm partial to Pre-Raphaelite art). So, Ophelia's a bit of a big deal. The painting is of her death, drowned in a river, surrounded by flowers. I decided that this was what I wanted to portray, because you can't do Shakespeare without being a little morbid (Titus Andronicus, anyone?).

Starting with the skin, you want to make it pale and corpse-like, being that we are doing the make up of a dead character. I started with Stargazer's White Foundation, mixing it with a little of my normal foundation. The consistency of this foundation isn't the best, so use something like a stippling brush to apply it (or other things good at blending, such as a sponge). Then use a medium brown eye shadow (or a contour powder) to further deepen the depths of your faces - below the cheekbones, under the chin, under the lower lip, the sides of the nose, the temples, under the eyes and the corners of your mouth. No blush is needed, for obvious reasons. I did my brows quite full, for a youthful effect.
For the eyes I wanted to emphasize the size and shape, much like the eyes painted by Millais. I started by priming my eyes with Two Faced Shadow Insurance. I then took a small angled brush and a medium brown eyeshadow - Cork by Mac - drawing a line just above my crease, following the line into the nose to make the eyes appear a little larger and flicking out at the other end. I darkened this line with a darker brown - 329 by Inglot - and then blended the line a little with a clean blending brush. I used this same shadow under the eye, winging the line out under the tear duct, again making the eye appear larger. I then used Nyx Jumbo Eye Pencil in Milk all over the lid, the inner corner and the waterline, blending out with my finger. On the lid I used Honeycomb from Sleek's Au Naturel palette and I used Nougat from the same palette in the inner corner. I then used a Bourjois liquid liner to do a fine line on the upper lid with a small flick. Next, apply mascara, making sure it is quite defined and doll like for the lower lashes. I then applied eylure lashes - I can't remember which, but something with volume that gets longer in the outer corners.
 To finish, apply a clear gloss all over the lid to give that just drowned feel. I used a bourjois gloss. I would heap quite a lot of product on the back of my hand and apply it with my finger. Make sure you do this last, because you will not be able to change anything after you've done this. It also feels gross and creases like a bitch, so skip this step if you don't want to deal with that. I then loaded some mascara on my lower lid, dipped a cotton bud in water, and pressed the wet cotton bud onto the globbed mascara to simulate tears. Gently pat away the water droplet as it hits the bottom of your cheek, so the tear looks a little nicer.
For the lips, purse them, so no product will reach the creases, and pat the white foundation over them, so they look all cracked and unpleasant. Then take a pale blue eye shadow, purse your lips again, and pat the colour in the centre of the lips, so you look like you've suffocated to death. I then got more lip gloss and used a small brush to simulate water flowing out of a mouth.

And the make up is done. To complete, wet your hair and carry around a selection of flowers. This could be a great Halloween costume for you, if, like me, all your friends are literature nerds.
Finis.

Sunday, 2 November 2014

The Wonder of Sugar Skulls - A Totally Late, Somewhat Irrelevant Make Up Look

A couple of years ago I discovered the wonders of the sugar skulls. These amazing full face make up looks with a simple base look - that of a skull - and various designs and embellishments. All you need to do is google the term 'sugar skull make up' to get a plethora of incredible looks. Needless to say I was instantly inspired. So now, every Halloween - or Día de Muertos - I paint my face like a bright, beautiful skull.

This Blue Skull was the first I ever did. Blue is one of my favourite colours, and seemed suitably dark for a skull, so I chose to use it as my main theme. I started very simply, with only a little sparkle, and a very simple forehead design. This look was heavily inspired by the first google image I saw. I've branched out a little since then.

I believe I did this look a week after the Blue Skull. This incredibly creatively named Red Skull was my first try at branching out a little. I chose a different main colour and decided the design of hearts would give a cool effect. I promise you the little red sparkles surrounding my eyes were supposed to be hearts. Rather than having the petals surrounding the deep pits posing as my eyes, I decided to blend out the black with the red, creating an all around softer (more romantic?) look.

I did this look a year ago and am rather fond of it. Halloween is irrevocably tied up with Autumn and I felt that would be a rather lovely theme for a Sugar Skull. Autumn in a picture for me would be a golden leaved tree, so I used this in my look. Rather than the traditional petals surrounding the eyes, I decided to use Autumn leaves. And then I couldn't resist but to add some rhinestones, because, well, I really love rhinestones. The rest of this look is rather minimalist, which I feel works well (I could have been lazy, however).

And lastly we have the Jewelled Skull that I currently have on my face. I just wanted something utterly opulent. In the past I've done skulls with fairly natural themes, this year I wanted something utterly artificial. I also felt like playing around with doing full fledged teeth, rather than the simpler plain lines that look like stitches. For the actual skull features, I put in a little more effort, actually following the look of a skull, with the more prominent cheekbones and deeper temples. And more rhinestones, of course.
 As a little touch of advice for doing a look like this, an eye-liner pen is a massive help. I generally dislike eye-liner pens, they tend to be more grey than black, I can never get the sharp point I want, they dry out so quickly and in my experience, they really don't hug the lash line (I've tried three different brands and been heavily disappointed with all of them). Regardless, they're really great for this kind of look. You don't need too precise lines, but you want something a little more precise than a pencil (I realise a pencil can be precise, but it's a massive friggen pain). I've found liquid liner and gel liner a bit awkward too. Pen liners just make it so easy. I use the pen to sketch out the lines, I then fill it in with a pencil liner (typically a Nyx Jumbo Eye Pencil, I use Black Bean), I then set this with a black eye shadow. Parfait.