Sunday 25 October 2015

6 Makeup Looks To Make A Halloween Outfit - For When You Don't Want To Buy A Real Costume

So Halloween is on it's way, and I love it! It's a holiday for makeup artists, I swear. But I really can't be dealing with buying an expensive, but cheap looking, costume. I'm all about pulling a cute, little, black dress from my wardrobe and pairing it with some fierce paint (that and a few choice accessories).

So, here I have 6 makeup looks that will make a Halloween costume.


To start with we have the old faithful of all girls on Halloween, a black cat. Most girls will buy some ears, maybe a tail, and then just wear all black. This year you can go one step better and wear some costume appropriate makeup.
The key parts of the look are the nose and the whiskers, for a little extra, the intense cat eye, the dark lips and brushing up the brows.


Next is something a little different (and way harder). You really don't need anything extra with this look, because it's such a show piece. The skeleton. You'll need white foundation, black and white eyeliners and eyeshadows and a whole lot of patience. You will definitely impress, however.
You can go all out and buy a skeleton outfit (and a wig), but really, all this needs is a black dress.


Now, this is a much simpler look, and thus the accessories are key to make it work. The witch. You will at least need a witches hat, and maybe a broomstick if you're feeling particularly fancy.
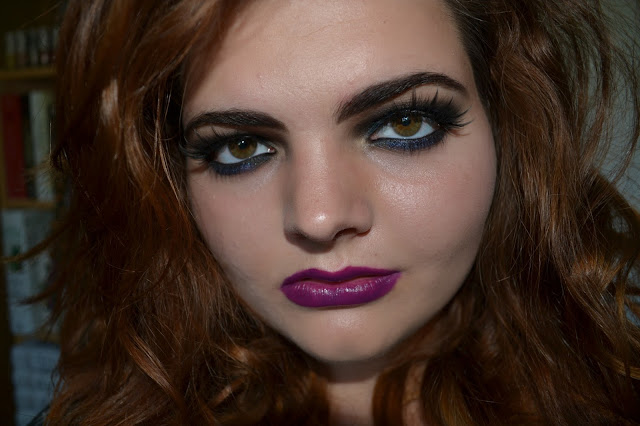
For the makeup, do a smoky eye using purple or blue tones, making sure to blend it lower under the bottom lashes than you would typically. Pair with a dark lip, I chose purple, as I feel it is very witchy.


The Vampire. The look I fall back on most. Mostly because of my enduring love for Vampire Diaries and True Blood. You can start with just the white foundation and the bloody mouth, but for a little extra, put red eyeliner on the water line and do some heavy contouring. For a sleek vampire, do a red lip and pair with some thick false lashes.


You can also do the 'hungry vampire' (which was inspired by Only Lover's Left Alive). Pat red lipstick in the centre of your lips and make the shadows in your face extra deep.
All you need to do is buy some cheap fake teeth and wear them for the first 5 minutes of the party and you're set.


This is another hard one, but really speaks for itself. A Raven. People may ask what you are, but they will say you look incredible regardless. The false lashes are fairly important to this look, but aren't all that expensive. If you have any kind of black feathers in your wardrobe, that's perfect, but really, you just need to wear something drapey and black and keep repeating 'nevermore' all night.


Finally, the Sugar Skull. Another mission of a makeup look, but well worth it. There are many styles out there (such as my post from last year). This year I chose to use roses as my theme, which is quite traditional. Pair this with some flowers in your hair and you're set.

There you go, 6 looks that will let you be a bit lazy this year.

Wednesday 21 October 2015

My Makeup Set Up - I Bought A New Desk For This

So I recently bought myself a new desk so I could actually work at my desk instead of having half of it covered in makeup. Let's be real, though, I bought it so I could apply makeup with more ease. BUT, my actual work desk is now usable, which is nice.

I've been pretty good with the organisation of my makeup since I've had enough to call it a collection. I have a lot of friends who just have makeup bags or leave their makeup in the bathroom. I did once do that too, about six years ago, though. I've got a fair amount of the stuff now, which means I need to be fairly creative in my organisation of it, so it's usable. (You ever have that thing where you don't use a product for ages because it's underneath a lot of other stuff? I'm trying to avoid that).

Now, for the first time in my life, I have a proper space dedicated towards my makeup, and it's super exciting. I can spread out my products so I can get to all of them, whilst still deploying some organisational skills to keep it neat.


This here is my new set up, and I love it. On the left I have lip products, on the right I have my eye products. My tools and face products are in the front. Very simple.


First things first is the mirror. I don't have a particularly large one, so I have stacked mine on top of some Glossy Boxes (I said I would find a use for them). The boxes are attractive and big and sturdy enough to hold the mirror safely. I also store some makeup wipes and a makeup remover behind the mirror, just because there is the room and it looks a little neater.


Next are my everyday tools that don't have a dedicated space, this being liquid foundations, concealer, primer, brow gel and cotton buds. I use these frequently, so I like to have them easily to hand. (The palettes to the left are lip ones and thus are in the correct place, sort of).


The rest of my face products I have in another Glossy Box. This includes blush, contour, bronzer, highlighter and face powder. I don't own many of these things, so they all fit in one box nicely together. I stack them in order of use, again, for convenience.


For my brushes and liners I use pencil pots (from WHSmiths I believe). The Real Techniques brushes stand by themselves, so I have them to the side. For the liners I have a bit of cloth at the bottom of the pot to prop them up a bit. This isn't ideal to me, it could do with some improvement, but I've yet to do something about it. At the moment it works fairly well, I just have to take a little time looking for lesser used brushes and liners.


For the tools I use day to day I use a little ramekin dish that I got with a Gu pudding (which, for reference, are fancy desserts that you can buy in supermarkets in the UK, they're delicious, just expensive). I wash out the ramekins and then use them for other things, such as holding makeup items. In this dish I have lash curlers, tweezers, a pencil sharpener, nail scissors, lash glue and my Real Techniques sponge (the sponge I got from my October Glossy Box doesn't fit in very well).


For my spare tools I use the top section of this makeup case. I also store the false lashes I use most in this compartment.


The next compartment down I use for more special effects things, such as my fake blood, rhinestones and costume lashes. It also acts as a little bit of a dumping ground as it's not used very often. (The tiny ornate box contains cut up bits of false lashes, basically for Electra Heart era Marina and the Diamonds looks).


The final section contains the rest of my false lashes, which are so hard to organise, I swear to God. I put lesser used ones in here, basically because I don't want to disturb the arrangement. I got this box many years ago, it originally contained makeup, I just pulled out the organisers and used it for my own purpose. You might possibly be able to get an equivalent now, considering it's nearing Christmas and all.


Next is my single eyeshadows, loose pigments, glitters, gel eyeliners and cream eyeshadows. Basically everything eyeshadow related that's not in a palette. This is arranged rather haphazardly as I don't use these products that often. The most used is Cork in the corner, which is easy to get to. The box is one I got toiletries in years ago (I cling on to useful things), any box will work.


In front of this box I have my three Inglot palettes, well loved and well used. I have them here for convenience.


The rest of my palettes are stacked near the back. My sleek ones being in a letter divider I also got from WHSmiths (stationary organisers are good to organise makeup too). My other palettes are propped up behind this, easy to see and easy to get to (I use my Vice Palettes a lot).


This is another Glossy Box, which contains ramekin dishes to hold up products that can't stand on their own. The Glossy Box is only for neatness sake. There is a semblance of order to the ramekin dishes; one contains glitter and liquid liners, another contains lip glosses, another contains lip pencils and lip pens, then there is just a miscellaneous one for things that don't fit else where, basically. I have my liquid lipsticks standing alone as I use them a lot.


Finally, I have my lipsticks (and Sleek Pout Paints). I got these acrylic lipstick holders from amazon for very cheap. They came chipped, so be warned, but they function perfectly and organise my lipsticks beautifully.

There you go, my makeup collection and how I organise it. It could be neater, but it works for me.

Wednesday 14 October 2015

October Glossy Box - I Missed Two Months, But I'm Back On A Good One

So I missed posting two months of Glossy Boxes on here, but I'm back with October's offerings. I even got this box through the post today, see how productive I'm being!

So, this month's box comes with five full-size products, which is rather lovely. Thus far this box seems to be pretty great.


First off is Talika's Photo-Hydra Day Moisturiser, which is worth £24.85 - which is about eight times more expensive than the Simple Moisturiser I typically use. The reasoning behind it's inclusion in the box is that Autumn is a rough season on the skin, which I agree with. So I'm excited to try this product. My only trepidation is that my skin is fairly oily, so I tend to buy moisturisers that are geared towards oily skin. Here's hoping this product doesn't horrifically break me out.


Next up is this little darling from Lanolips, Lemonaid Lip Aid. It retails at £8.99, again, more expensive than the lip balms I usually buy, but this does a little more. It is supposed to exfoliate as well as moisturise the lips. I'm wearing it currently and it feels light and nice on the lips. It also smells of actual home-made lemonade, which is great.


This is Play Paint by Jelly Pong Pong, which is a lip and cheek stain. It costs £8.95. It is advised that you only use a grain of rice sized amount, which I concur with - I had to seriously buff this out on the cheeks.


Regardless, I really like this product on the cheeks, it also provided a lovely, buildable colour on the lips. And, whilst I usually move towards burgundies in Autumn, I think I'm actually going to wear this a little bit.


Next is the Haute Light Highlighting Pencil from So Susan. Now I'm on board for any kind of highlighter. Highlighting is such an easy and natural way to enhance the face. I also don't really own a matte highlighter, so this product interests me.


Here is my placement of the highlighter. Now, it's not as creamy as a Nyx Jumbo Eye Pencil, but it's by no means hard.


Here is the highlighter blended in. Blending it took a little work, and can only really be done with a finger, but I think it looks rather good. I also applied it to the waterline for good measure, which I really like the effect of, so I see myself mostly using this product for that purpose.


To finish is the Airbrush Blending Sponge by Nicka K, which sells for £6.50. Now, I already own the beauty sponge from Real Techniques, but from my cursory use of this sponge, I think I prefer it. The shape is more intuitive to the contours of the face and it have a denser make up than the Real Techniques Sponge, which I feel works better for applying products.

Overall, I really like the contents of this box. (The past two months were also pretty great). In my mind, I'm really glad I'm subscribed to this box. It's exciting to receive every month and I'm discovering some really nice products.

Next post I'll be talking about my make up set up, as I got a new desk yesterday, so I actually have a space dedicated to make up (and also one dedicated to work, but who cares about that...).