Friday 26 August 2016

FOTD Graduation Makeup - For When I Wanted To Look My Absolute Best

Over a month ago, now, I graduated from University. The ceremony was wonderful, I got to celebrate the with all my favourite people and be incredible proud of my friends and myself. I never thought that the day would mean so much, but it did.

I knew that the photos from the day would be around for the rest of my life, so I figured it was probably a good idea to look the best I could. I had a gorgeous dress, picked out my favourite jewellery, carefully painted my nails and curled my hair into perfect old hollywood waves. All that was left was my makeup, and as a point of pride, it had to be on point.

I knew I wanted a pinup-esque look, with slightly-above-neutral eyes, winged liner, red lips and extravagant lashes. I was so anxious that the makeup would go wrong (we've all had many bad liner days), fortunately, everything went well and I felt somewhat blessed.


To begin with, I needed perfect skin, so I started with my usual primer, Benefit's Porefessional. I then used Mac's Mineralize Concealer in NC20 under my eyes, around my nose and everywhere where I had discolouration. I set this all with Studio Fix Powder Foundation in NW20 by Mac. I then contoured with Benefit's Hoola, used Nars' Super Orgasm for blush and highlighted with Becca's Shimmering Skin Perfector in Moonstone.


For my brows I used Mac's Cork on the inner section and Inglot's 329 for the rest of the brow. For the eyes I started by priming with Too Faced Shadow Insurance, I then used Mac's Cork in the crease, using Inglot's 329 to deepen the crease. I then used Nyx Jumbo Eye Pencil in Iced Mocha on the lid, setting it with Illamasqua's Pure Pigment in Ore.


I then used So Susan's Haute Light Highlighting Pencil on my waterline and in the inner corner. I set the inner corner with Inglot's Body Pigment Powder in 180. Next I lined the lower lash line with Inglot's eyeshadow in 329. I then used Bourjois' Pinceau Liquid Liner for my winged liner, finishing with Urban Decay's Perversion Mascara and applying Huda Beauty's lashes in Sasha.


For my lips I initially created an outline just slightly bigger than my lips with Mac's Boldly Bare Lip Pencil, then applying Sleek's Matte Me Liquid Lipstick in Rioja Red. I finished by using Make Up For Ever's Mist and Fix Setting Spray to keep everything in place, it being a big day and all (and it worked, my makeup didn't budge all day).


And here's me with some Prosecco in my gown and cap looking really proud of myself. My nail polish is Barry M's Coconut Infused Nail Paint in Flamingo.


To close, this is me and my friends after throwing our caps in the air and laughing because we were very bad at it.

Wednesday 24 August 2016

Mac Retro Matte Liquid Lipsticks - I'm Still Only Using Liquid Lipsticks

I recently bought a couple more of Mac's Retro Matte Liquid Lipcolours from the Duty Free (the only positive part about the airport experience), so I figured I'd do a post about them, as they are rather lovely.

I've been riding the liquid lipstick train for about a year now and have had no desire to get off. I always get perfect lips with not too much effort, as long as I first line my lips with a neutral shade (my go to being Mac's Boldly Bare). Real lipstick seems like way too much effort now. I also get to fake that my lips are bigger than they are with matte shades.

The mac formula smells like almonds (which is great), and applies slightly drier than the other liquid lipsticks I use (MUA, Sleek, Kat Von D, Nyx), this is not a bad thing, though. Instead of feeling like a thick layer of liquid on the lips that dries to a slightly crusty matte, they apply and dry really comfortably, feeling nicer during the day. They wear really well, the only enemy being greasy food, and then, only the centre of the lips fades away. They retail for £21, so quite a bit more pricey than the MUA and Sleek ones that are my go to, but the formula is nice enough for me to justify it. Also, the range of colours is really good.


From Left to Right: High Drama, Dance With Me, Feels So Grand, Rich And Restless


High Drama


High Drama: This colour applies the most patchily out of the ones I have, but that can be attributed to it being super dark. Two coats does the job, three if you are doing close up, flash photography. Honestly, one looks fine in person if you apply it carefully. This colour is great if you don't have time to do much else to the rest of your makeup; it makes a look. I'm going to be wearing this all Autumn.


Dance With Me


Dance With Me: This is my favourite (possible of all my lip colours). It's a slightly darker, blood red, but not too dark to steal attention from the rest of the makeup, but dark enough to make a big impression on it's own. Again, a tad patchy, but fine for real life.


Feels So Grand


Feels So Grand: This is a perfect daytime red. It's just a bit brighter than a typical red that I would use (I always tend towards darker shades). This is a great standard red, that's not too intimidating. It also applied perfectly with one coat.


Rich And Restless


Rich And Restless: This is a beautiful peach shade that looks incredible with tanned, bronzed skin. England is actually having some Summer at the moment (meaning I'm sweating it out in my room with all the windows open), so this is a perfect shade to wear. It also complements strong eyes really nicely. I would say this needs two coats to look good in person, which very bright shades often need.

Overall, I really like Mac's contribution to the Liquid Lipstick game. They just feel so much nicer during the day and actually layer really well, rather than getting really crusty upon reapplication. They are pretty expensive though, so if you're near an airport, take advantage of that Duty Free, otherwise, see it as an investment piece and get yourself a damn good red.

Tuesday 9 August 2016

Gilded Makeup - Because Black And Gold Is The Best Colour Combination

Today I'm showcasing a look I did a little while ago which I'm choosing to call 'Gilded Coal Makeup'. It was inspired by me buying Illamasqua's Liquid Metal Palette, which is gorgeous, if not a little impractical as cream shadows always crease for me. In the palette is a beautiful, bright, true gold - as in, not too yellow toned.

Black and gold is one of my favourite colour combinations, so I figured I'd pair the two in a look. This could be a kind of District 12, Katniss Everdeen Ceremony look, if the Hunger Games is still relevant. Otherwise, I thought it looked dope.


I started by priming my lids with Too Faced Shadow Insurance, of course, this kind of look needs a good primer. I then used Urban Decay's Perversion Eye Pencil all over my lids, blending out the edges with a slightly denser, fluffy brush - my favourite is Real Techniques Base Shadow Brush. Using the same brush I set this base with a black eyeshadow from Inglot, then blending the shadow out towards my temples, up to the start of my brows and to an extended point on my nose. I deepened the colour by keeping packing on the shadow as it takes a while to get black eyeshadow really dark on the skin.


Now comes the fun bit. I took the gold shade - Electrum - from the Liquid Metal Palette and applied it as winged eyeliner, both on the lid and under the lower lashes with a fine, angled brush. I connected the two in and extended inner corner and created a double wing at the outer corner. I then set this with Barry M's Dazzle Dust in 10 (a gold). I sharpened the lines using a black liquid liner. I then applied Electrum on the outer two thirds of my brows, brushing the hairs upwards. I again set this with the Gold Dazzle Dust, also brushing it on my brow bone.


Next, I curled my lashes very thoroughly as I was not going to be using proper mascara. I started by applying a white lash primer, I then topped this with Electrum, applying it with a spooley. I then set this all with the Gold Dazzle Dust. I made sure to do this to both sides of my lashes and had to do it a couple of times to get the full effect.

For my skin, I primed with Benefit's Porefessional, used Mac's Studio Fix Powder Foundation, Nars' blush in Outlaw, Benefit's Hoola to contour and Topshop's Glow and Sleek's Subsolar from the Solstice Palette to highlight.


For my lips I started by lining them with Perversion Eye Pencil, I then used MUA's Luxe Velvet Lip Lacquer in Potent all over the lips. Then I applied Electrum in the centre of the lips, setting it and blending it out with the Gold Dazzle Dust.


I then decided to spruce the look up a bit, because I was a little dissatisfied. I started by applying proper mascara on my lashes (after all that work), which immediately changed the look. I then used Inglot's Eyeshadow in 50 to soften all the edges of the black eyeshadow.


I finished by applying the red eyeshadow to my cheeks to tie the look all together.

I actually quite liked this look by the end of it. I have no idea if this could be themed for a costume, but hey, it was fun to do and looks pretty damn cool.

Thursday 4 August 2016

FOTD - Gay Pride Makeup

As Gay Pride is happening in Brighton this weekend I thought I'd share the look I wore to London Pride. I worked the morning of and the day after Pride, but I desperately wanted to go, as it would be my first ever Pride.

I had a wonderfully time and it felt so good to be surrounded by people in my community. One of my friends also went in drag and had so many people coming up to him to appreciate it, it was great.


I wanted to have really done skin, so I started with Benefits Porefessional as my Primer. I then used Mac's Mineralize Concealer under my eyes and around my nose and mouth. I used Mac's Studio Fix Powder Plus Foundation over the top of this. I contoured with Benefits Hoola and highlighted the tops of my cheek bones, my cupid's bow, my nose, my chin and my forehead with Becca's Shimmering Skin Perfector in Moonstone - the more plastic looking the better. I then used Nars' Super Orgasm as my blush.


 I outlined my lips with Mac's Boldly Bare, slightly overdrawing them. I then used MUA's Luxe Velvet Lip Laquer in Serene as my lip colour. On my brows I used Mac's Cork on the inner section and Inglot's 329 for the rest of the brow, I then used No7's Lash and Brow Perfector to keep all the hair's in place.


For my eyes I started by priming my lids with Too Faced Shadow Insurance. I then used Cork in the crease, deepening it with Inglot's 329. I then drew a fine line under the lower lashed with 329. I then applied Lit's Glitter in Champagne Wishes on the lid, using Lit's Clearly Liquid Glitter Base. I then used So Susan's Haute Light Highlighting Pencil on my waterline and in the inner corner, setting this with Inglot's Body Pigment Powder in 180.


To finish, I drew a cat eye with Bourjois's Pinceau Liquid Liner, applied Urban Decay's Perversion Mascara and used both top and bottom false lashes, both from Eylure, setting everything with Make Up For Ever's Mist and Fix Spray.


To complete the look, wear excessive amounts of sparkly jewellery, completely curl your hair and wear a dusky pink, faux satin, slutty Prom dress. The handsome man with a purple glitter beard is optional, but recommended.

Happy Pride!

Tuesday 2 August 2016

Anastasia Beverly Hills Modern Renaissance Palette - My Newest Box Of Pretties

So the Modern Renaissance Palette is one of those makeup items that has been getting a whole lot of attention on the internet and this time around I felt it well deserved. Whilst I found the Naked palettes underwhelming and just not for me, this palette I am all about. Multiple shadows in this palette got me actively excited, so, as a result, I had to have it.

I justified the purchase as an early graduation gift to myself (which is something I did recently, go me! I'll do a post about the makeup I wore to it at a later date). Anastasia Beverly Hills is a brand that is hard to get in the UK. I tend not to want to use websites I know little about, and the one I did know about that stocked the brand- the Beautylish store - whilst reliable and trustworthy, has steep importation fees (not their fault). So I stumbled upon Cult Beauty which deliverers to the UK with no extra costs and has some cool brands that I haven't used before. I googled the site and Zoella used it one time, so I figured it was legit.

I ordered this palette and two pairs of Huda Beauty lashes (which I will also talk about at a later date). Everything came in good time with no complications, so I'd reccomend Cult Beauty as a place to order from if any of the brands on there tickle your fancy.

The Palette retails at £41, which is a bit steep, but it is pretty dope, sooooooo... (But seriously, be responsible with your money).


It comes in this delightful pink box.


The outside of the palette is a pink suede, the words being embossed in it. It's cute but gets dirty quickly, I travelled with it and it did not come away unscathed (you'll notice the black smudges at the corners). I recommend cleaning with a dry toothbrush, if you care enough to clean it.


It has one of those annoying floppy hinges (Xsparkage says these need palette Viagra, which is a great turn of phrase), but it lies flat just fine, so I don't find it obnoxious (the Naked 3 would always just flop back onto it's mirror when I tried to use it, making it so hard to work with, I don't want to have to hold the palette the whole time, ANYWAY). The palette comes with a dual ended brush which is actually really lovely to use and is generally really nicely presented and sleekly designed.


Here's a group shot of all the colours, look at all those wonderful individual shades. I'm all about different warm, matte shades that aren't just brown. This palette has great ochres and reds and oranges and burgundies and taupes. Throw in some pretty shimmery shades and you have magic (in my opinion).


To begin with we have Tempera, a pale nude shade that is a satin, which means it is basically matte, but it has a slight shimmer to make it easier to blend.


It's a bit to pale to work as a blending shade for me, but it is a lovely, low key, highlight shade. It blends really nicely.


The name for this one is pretty self explanatory, a pale golden shade with a hint of a brown base (I'm not sure how else to describe ochre). This is also a satin, with a lovely pale glitter that makes it colder than is would have initially been.


It also blends really nicely. I think I would use this shade as a subtle lid colour, it compliments the more purple toned shadows really well.


Vermeer is one of those gorgeous shimmery shades that tie everything together. It's a taupe with a pale silver shimmer.


This applies absolutely beautifully and always sidles itself into being my inner corner colour. I love a shade like this in a palette.


Buon Fresco is a pale mauve satin. This is such an individual shade and works so well with the other colours.


I've been using this shade as both a transitioning colour in the crease and a lid colour. It's surprisingly versatile.


Antique bronze is a plummy brownish shade with a gold and silver shimmer. It is so pretty.


Being a shimmer it blends wonderfully. This is a great lid shade, possibly to be used at the outer edges of the lid to deepen a look.


Love Letter is one of the most exciting colours in the palette, being a blue-toned deep pink. It's a satin, but applies matte.


It takes a little working - as all shades like this will - and works best with a sticky pencil base (such as Nyx's Jumbo Eye pencils). Being basically matte, this shade will work wonderfully in both the crease and on the lid.


Cyprus Umber is a cold, dark brown matte. Another key colour in a palette for me.


I truly love cold browns, and this one works especially nicely in contrast to the warmth of the rest of the palette. It's really buttery and pigmented and generally just a great shadow to have in a palette. This colour is all about deepening the crease and lining the lower lash line.


Raw Sienna is a great warm, medium brown. It's a matte shade.


It applies really nicely and works great as a crease shade. Another palette staple for me.


Burnt Orange is another exciting shade for me. Loads of palettes will have new and exciting lid shades, but not many provide crease alternatives. This palette is full of them and Burnt Orange is one. It's a warm, orangey brown matte.


Again, it applies nicely and is a great crease colour.


Primavera provides an alternative to Vermeer. Where Vermeer is cold, Primavera is warm. A light gold with a bright shimmer.


Like every shimmery eyeshadow, this applies wonderfully. With the added warmth to this colour I would use it both in the inner corner and on the lid. I love that this palette provides two colours that can work in the inner corner really well.


Red Ochre is basically why I bought this palette. A shade like this does not come along very often and whenever anything similar pops up in a palette I buy it. It's a lovely burgundy matte and it is everything to me.


This is the kind of eyeshadow I would happily use on it's own, smudging it all over the lid, into the crease and under the eye, creating a subtle grungy look. Unfortunately it is harder to work with than some of the other mattes, in that the pigmentation isn't all there right away, but it still blends really well. My love is by no means reduced.


Venetian Red is a pretty, pretty baby and deserves some attention. It's a deep, blue-based pink with a silver shimmer.


It, like Love Letter, will thrive atop a sticky base. It applies really smoothly but will take a bit of working to get the desired pigmentation. A perfect lid shade.


Warm Taupe is another interesting shade, providing another cold shade to combat the warmth of all the other colours. It's a matte.


It's nicely pigmented and applies very well. It works as a really good transitioning colour in the crease.


Realgar was the other shade that really excited me in this palette. A warm, terracotta orange matte.


The pigmentation is great and it applies wonderfully. This is another colour that I would just use everywhere on it's own, creating quite a nice, summery look.


I'm calling this look my Daytime one. A light wash of colour with a touch of shimmer. Great for a Summers day (never mind that it has been raining pretty regularly in England).


This is a really quick and easy look to do with the palette.


Over a base of Too Faced Shadow Insurance I blended Burnt Orange all over the lid and into the crease and then underneath the eye. Blending out to the brow bone with Tempera.


I then applied a beige eye pencil onto my waterline and in the inner corning, blending that in with my finger. I applied Primavera over this in the inner corner and slightly onto the lid.


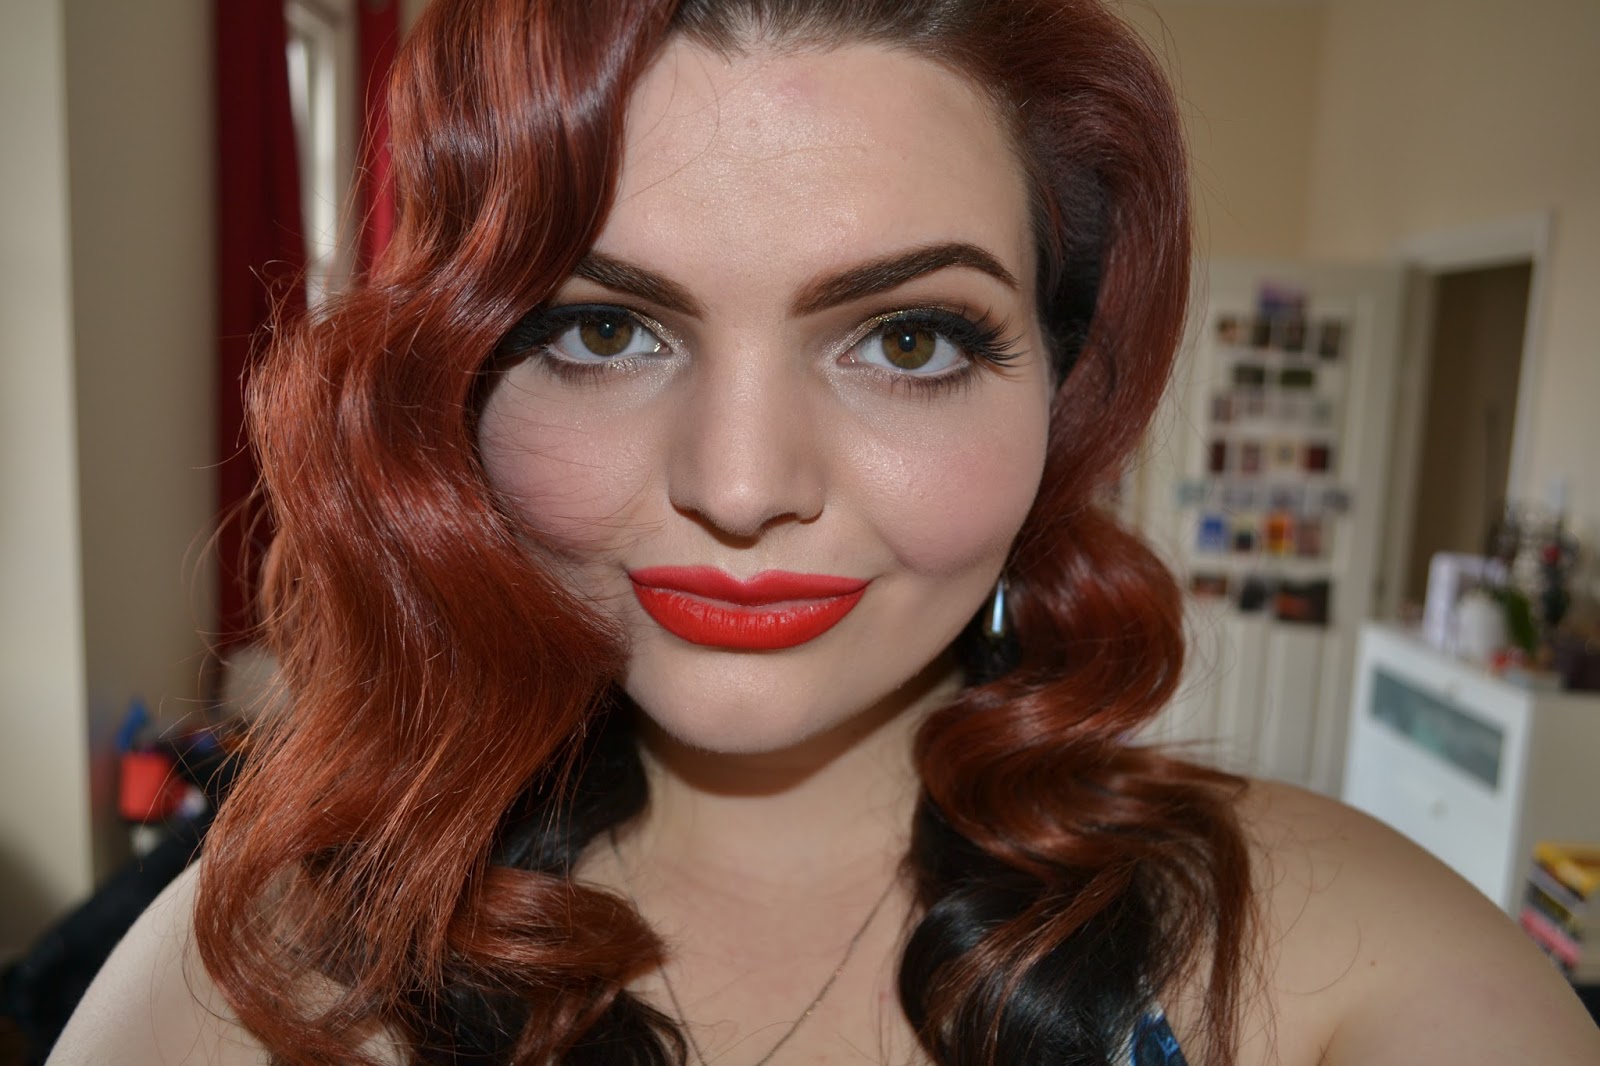
My Nighttime look takes a little more effort.


The warm colours in the palette allowing for a nice twist to a smokey eye.


Using the same base, I blended Warm Taupe into the crease, deepening it with Cyprus Umber, then running that under the lower lashes. I used Tempera to soften all the edges.


I then applied Nyx's Jumbo Eye Pencil in Milk on the lid, blending it in with my finger. Over that I patted on Venetian Red, darkening the outer corner with Antique Bronze. I then applied Vermeer in the inner corner. I then did a cat eye to pull the look together.

Overall, this is a pretty, versatile palette with some interesting colours you won't see in many other palettes. There's enough variation in colour and texture to be able to create a range of looks without having to use any other eyeshadows and I love it when that is the case. It may be pricey, but I don't regret buying this palette.